MikeLoop Manual
Welcome
to MikeLoop, your creative and intuitive app for live looping!
I started working with loop machines in the early 90s when I studied jazz vocals at the University of the Arts in Berlin. Loops in music performances were still a very experimental endeavor back then and I spent a lot of time combining guitar effects, looper prototypes and other gear to create a setup for my vocal solo performance.
When I started teaching loop workshops a few years later I used whatever loop device my students would bring to class. There are a lot of loop machines out there but none of them really made me happy:
-
some loop machines force you to click your way through menus to control them. They are not intuitive to use and can stress you out in a live performance situation.
-
other loopers are easy to use but they don’t have enough functions to allow for a complex musical loop performance. You will quickly get bored with them.
I decided to develop a loop app that avoids these problems. I wanted MikeLoop to feel like an acoustic version of the holodeck in Star Trek with as few clicks as possible lying between my ideas and my musical pieces. When I met Fabian in 2013 on an artist residence in the city of Moers, we decided to develop this app together. So here is the result for you to enjoy!
MikeLoop is the result of many years of work. 30 years of loop experience are packed into it.
You don’t need any loop experience to start working with MikeLoop. You can work with a few simple functions at first until you feel comfortable to try more complex ideas.
Once you combine the 3 Loops of MikeLoop you will find endless possibilities to express yourself. MikeLoop is more like an instrument rather than an effect device in that respect.
MikeLoop is actually 3 loops in one, Simple Loop, Matrix Loop and Dub Loop. Each loop has its own strengths and weaknesses. Once you combine the 3 loops in your performances you can create meaningful musical pieces with elements like verse and chorus, ABAC forms, separate basslines over the same groove or chord progressions.
You can also create crazy experimental sound carpets by playing loops backwards, slowing loops down or speeding them up like a vinyl record, cut loops into pieces on the fly and glue them together again in a new way etc. etc.
We designed MikeLoop as self-explanatory as possible, so you can figure out most functions by just playing around. If you want to dig deeper, then this manual will show you a few tricks and shortcuts that might not be obvious at first glance.
If you don’t like written manuals you can also stick to my video tutorials. You find tutorials for every level from beginner to expert on mikeloop.app.
Colors and shapes
Every color you see on the MikeLoop screen has a specific meaning. The buttons also have a specific shape.
Purple is the color of all Simple Loop buttons.
All Simple Loop buttons are shaped like a stylized S
Turquoise is the color of all Matrix Loop buttons.
All Matrix Loop buttons are shaped like a stylized M
Brown is the color of all Dub Loop buttons.
All Dub Loop buttons are shaped like a stylized D
Blue is the color of all Effect buttons
MikeLoop’s loop and track buttons are divided in half horizontally. The upper half changes its color while you work with your loops to help you understand what’s going on:
White – loop/track is empty
Red – loop/track is recording
Green – loop/track is playing back
Orange – loop/track is overdubbing
Grey – loop/track is muted
Black – loop/track is active
Apart from its looping capabilities, MikeLoop is also an effect device with a built in Reverb and Octaver (the Bass button). All effect buttons are colored in blue.
The 3 Loops
There are 3 loop modules in MikeLoop
- Simple Loop
- Matrix Loop
- Dub Loop
Simple Loop
As the name suggests, Simple Loop has rather basic functions. You can record a loop and overdub over it. You can play a loop backwards and at half or double speed.
Simple Loop is monophone, i.e. you can only play one loop at a time and you can’t undo overdub layering.
Simple Loop controls
Number buttons
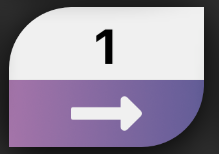
- press a number button to start a recording
- press the Number button again to play the loop right away
There are actually many ways to end a recording in Simple Loop, we call them Shortcuts. Here’s how it works:
After you start a recording, press
- Overdub to go straight to Overdub mode and keep recording
- Stop to end the recording and mute the loop
- Faster to play the loop at double speed
- Slower to play the loop at half speed
- Reverse to play the loop backwards
- Velocity to open the Velocity pad during recording and pick a pad button to end the recording
- Clear to delete the recording
Overdub

Press Overdub to activate Overdub mode. In Overdub mode you can record many layers of music onto a single loop:
- record a loop with a Number button
- activate Overdub mode
- record a 2nd and 3rd voice over your existing recording
- press the Overdub button again to end Overdub mode
Beware that you can’t undo the layering. After you recorded a second layer the 2 recordings will be merged and can’t be separated. If you need undoable layers you can work with Matrix Loop instead.
Stop
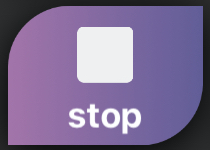
Press Stop while a loop is playing to mute the loop. You can restart a loop by pressing a Number button.
Sync
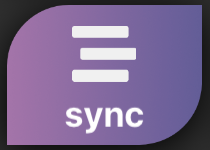
If you wish for all Simple loops to have the same length you can activate Sync mode. After you record the first loop, all loops will have the same length as that first recorded loop.
Reverse

Pressing the Reverse button while a loop is playing will change the direction of the recording i.e. the recording will play backwards. The Reverse button always controls the active loop:
- record 2 loops with 2 number buttons
- play back loop 1, press Reverse to play it backwards
- press the 2nd Number button to play loop 2
- press Reverse, now Reverse will control loop 2, so loop 2 will play backwards
- play back loop 1 again, it will still play backwards
The reverse button is meant to be fast and intuitive for instant results. If you prefer a more planful approach you can also control speed and reverse play with the Velocity pad.
Faster and Slower

Press Faster or Slower to play your loop at double or half speed. This will also cause the pitch to go one octave up or down, just like a vinyl record playing at a different speed.
Faster and Slower will react to whichever loop is active (see Reverse)
You can also control speed and reverse play with the Velocity pad.
Velocity

Press the Velocity button to activate Velocity mode.
press a Number button to open the Velocity pad with 6 pad buttons:
- top left (backward arrow x2): loop plays backward at double speed
- top right (forward arrow x2): loop plays forward at double speed
- middle row (backward arrow): loop plays backward at normal speed
- middle row (forward arrow): loop plays forward at normal speed
- lower left (backward arrow x1/2): loop plays backward at half speed
- lower right (forward arrow x1/2): loop plays forward at half speed
Tap anywhere outside the Velocity pad to deactivate Velocity mode
Clear
![]()
Hold one finger on the clear button and press a number button simultaneously to delete a loop. You can also double click the Clear button to delete all Simple loops in one go.
Volume All

Control the volume of all Simple Loops with one slider
Volume Individual

Control the volume of the active Simple loop. The number on the slider indicates which loop is active. Simple Loop will remember the volume of each loop and display the active loop’s volume on the slider
Matrix Loop
Matrix Loop is organized in tracks:
- You can record a loop on the first track (1a) and then add layers on the other tracks (1b, 1c etc.). This keeps the layers independent so they can be deleted or muted separately.
- You can overdub layers on each track.
- You can play each track backwards and at half or double speed.
Matrix Loop controls:
Number buttons
Press a number button to start and stop a recorded loop. You need to record a track first to use a Number button.
Track buttons
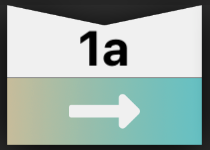
- press a track button to start a recording (for example 1a)
- press the track button again to end the recording. The track will start to play right away
- press a 2nd track button (for example 1b) to start recording a 2nd layer onto a separate track
- press 1b again to end the recording. Matrix loop will quantize 1a and 1b so that they will stay in sync
You can mute a track by pressing its track button while the track is playing. Pressing the track button again will unmute it.
There are actually many ways to end a recording in Matrix Loop, we call them Shortcuts. Here’s how it works:
After you start a recording (on 1a in this case), press
- 1a again to play the loop right away
- 1b to end the recording of 1a and start recording a 2nd layer onto 1b right away
- 2a to end the recording of 1a and start recording a new loop on loop 2
- Overdub to go straight to Overdub mode and keep recording on 1a
- Number button to end the recording and mute the loop
- Faster to end the recording and play the track at double speed
- Slower to end the recording and play the track at half speed
- Reverse to end the reocrding and play the track backwards
- Velocity to open the Velocity pad during recording and pick a pad button to end the recording
- Mixdown to end the recording and start a Mixdown
- Copy to end the recording and enter copy mode
- Clear to delete the recording
Overdub

Press Overdub to activate Overdub mode. In Overdub mode you can record many layers of music onto a single track (this works pretty much like Overdub in Simple Loop)
Mixdown
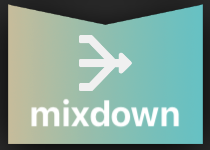
- create a Matrix loop and listen to the tracks playing
- press Mixdown at any point to start a Mixdown recording.
- you can switch between loops during the Mixdown recording.
- press Mixdown again to end the recording. Matrix Loop will merge all the tracks that were playing and copy them into track a of your active loop. The recording will play back right away. Beware that a mixdown will delete all the tracks in your active loop.
- you can also end the recording by pressing an empty loop botton. Matrix Loop will copy the recording into track a of the empty loop. The recording will play back right away. This way, no tracks will be deleted.
Reverse

Pressing the Reverse button while a loop is playing will cause the active track of that loop to play backwards. The Reverse button always controls the active track, i.e. the track that you touched last:
- record something on track 1a
- press Reverse, track 1a will play backwards
- record something on track 1b
- press Reverse, track 1b will play backwards
- press Reverse again, track 1b will play forward again
The reverse button is meant to be fast and intuitive for instant gratification. If you prefer a more planful approach you can also control speed and reverse play with the Velocity pad.
Faster and Slower

Press Speed up or Speed down to play a track at double or half speed. This will also cause the pitch to go one octave up or down, just like a vinyl record playing at a different speed.
The speed buttons will react to whichever track is active (see Reverse)
You can also control speed and reverse play with the Velocity pad
Velocity

Press the Velocity button to activate Velocity mode.
Press a track button to open the Velocity pad with 6 pad buttons:
- top left (backward arrow x2): loop plays backward at double speed
- top right (forward arrow x2): loop plays forward at double speed
- middle row (backward arrow): loop plays backward at normal speed
- middle row (forward arrow): loop plays forward at normal speed
- lower left (backward arrow x1/2): loop plays backward at half speed
- lower right (forward arrow x1/2): loop plays forward at half speed
Tap anywhere outside the Velocity pad to deactivate Velocity mode.
Copy

You can copy tracks from one Matrix loop to another:
- press the number button of the loop you want to copy FROM (source)
- press Copy to activate Copy mode. All tracks that are possible copy destinations will start blinking.
- press a track button for a track you want to copy TO (destination). You can also copy a whole loop by pressing a number button.
- press Copy to deactivate Copy mode.
Stutter

Stutter mode changes the behavior of number and track buttons:
1. record some music on several tracks to test Stutter mode
2. press Stutter to activate Sutter mode
3. whenever you press a number or track button, the loop or track will start playing from the beginning. You can create a stutter effect by quickly pressing the same track button over and over again. Beware that in Stutter mode there is no way to stop loops or mute tracks.
4. press Stutter again to deactivate Stutter mode
Clear
![]()
Hold one finger on the clear button and press a number button simultaneously to delete a loop.
Hold one finger on the clear button and press a track button simultaneously to delete a track.
You can also double click the Clear button to delete all Matrix loops in one go.
Volume Loop

Control the volume of a Matrix loop. The number on the slider indicates which loop is active. Matrix Loop will remember the volume of each loop and display the active loop’s volume on the slider.
Volume Track

Control the volume of each track with separate sliders. The Volume Track sliders are linked to the active loop:
1. press Number button 1 to activate it
2. change the volume of the Track sliders
3. press Number button 2
4. change the volume of the Track sliders
5. press Number button 1 again. The Track sliders will jump back to the old setting.
Dub Loop
Dub Loop functions as a kind of loop hub. It helps you create transitions between songs and invent experimental soundscapes. It is a very powerful tool with hidden depths, so take your time getting accustomed to it.
Dub Loop is actually 2 loops in 1, loop A and loop B. You can never play both loops at the same time. The A/B Double button shows you which loop is active. You see the active loop lie on top.
Dub Loop controls:
A/B Double button

This button controls 2 loops (A and B) that are closely connected. You see the active loop lie on top and the inactive loop in the back:
- press the Double button to start a recording onto the active loop.
- press the Double button again to end the recording. The loop will start playing right away.
- pressing the Double button again will start a new recording onto the active loop and delete the old recording.
There are actually many ways to end a recording in Dub Loop, we call them Shortcuts. Here’s how it works: After you start a recording (on loop A in this case), press
- Overdub to go straight to Overdub mode and keep recording
- A->B Mixdown button to end recording on loop A and start a Dub-recording on loop B
- Stop to end the recording and mute the loop
- Select to end recording on loop A and activate loop B
- Reverse to play the loop backwards
- Clear to delete the recording
Overdub

Press Overdub to activate Overdub mode. In Overdub mode you can record many layers of music onto a single loop (this works pretty much like Overdub in Simple Loop)
A->B Mixdown

You can record a part of loop A into loop B with the A->B Mixdown button (Dub recording).
Here’s an example:
Suppose loop A is active (lying on top on the Double button):
- record a loop onto loop A with the Double button and play it back
- press the A->B Mixdown button while loop A is playing. Loop B will now listen to loop A and record it (you can think of it as a real time copy).
- press A->B again to end your recording. Loop B will now be active and playing, so the Double button will switch and you will see loop B lying on top on the Double button. A->B be switches to B->A and you hear your new recording play on loop B.
You can do a lot of cool stuff with A->B Mixdown, like cut a short piece out of a loop or create a long loop out of repeated short loops.
A->B Select

Press Select to switch between loops A and B. You will see the active loop lie on top on the Double button.
- if loop A is playing and you press select, then loop B will become active and start playing right away.
- if loop A is mute and you press select, then loop B will become active and be mute.
Play (and Stop)

- press Play to have the active loop start playing (the play button will turn into a stop button)
- press Stop to have the active loop stop playing (the stop button will turn into a play button)
Link

Press the Link button to put Dub Loop in Link Mode. Link Mode creates a link between Dub Loop, Matrix Loop and Simple Loop. Here’s an example:
MikeLoop usually keeps the 3 Loops separate:
- deactivate Link Mode
- play back a Simple loop
- record a melody onto a Dub loop while Simple Loop is playing
- stop the Simple loop. You will now hear your melody play back on the Dub loop with no Simple Loop
Now we will link the 3 Loops:
- double click Clear on Dub Loop to erase your melody
- activate Link Mode
- play back your Simple loop again
- record your melody onto the Dub loop again. Dub Loop will record your melody and also whatever is playing at that moment on Simple Loop.
- stop Simple Loop. You will now hear your melody play back on Dub Loop merged with whatever was playing on Simple Loop during your recording.
In short: with Link Mode active, Dub Loop “listens” to Matrix Loop and Simple Loop during a recording, thus creating a real time copy.
Please note that Matrix Loop and Simple Loop are not linked to each other, so only Dub Loop can “listen” to the other 2 loops.
Reverse

Press the Reverse button while a loop is playing to change the direction of the recording i.e. the recording will play backwards.
Clear
![]()
Hold one finger on the clear button and press the A/B double button simultaneously to delete the active loop. You can also double click the Clear button to delete both Dub loops (A+B) in one go.
Speed slider

You can change the speed and pitch of the active Dub loop with the Speed Slider:
1. record a loop onto the Dub Loop and play it back
2. sliding your finger over the Speed Slider to the right will make the loop play faster and higher, just like a vinyl record that is spinning too fast.
3. sliding your finger over the Speed Slider to the left will make the loop play slower and lower, just like a vinyl record that is spinning too slowly.
Range

Press Range to change the range of the Speed Slider. You can switch between 1 Octave and 2 Octaves.
Mode
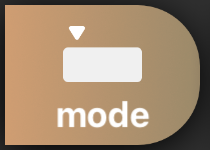
Pressing the Mode button changes the way a loop is pitched with the Speed Slider. There are 2 modes:
-
in Chromatic Mode your loop will be pitched in chromatic incremental steps. The Speed Slider will indicate how many half notes are pitched in numbers. For example, if your loop is pitched a major 3rd up, then the Speed Slider will display a 4 (4 half notes equal a major 3rd). If your loop is pitched a perfect fourth down, then the Speed Slider will display a -5 (5 half notes equal a perfect fourth)
-
in Slide Mode your loop will be pitched continuously. The Speed Slider will indicate the pitch in percent. Use the Range button to either slide from 50% (1 Octave down) to 200% (1 Octave up) or from 25% (2 Octaves down) to 400% (2 Octaves up).
Reset
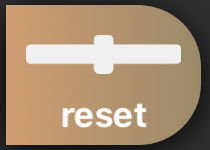
Press the Reset button to reset the Speed Slider to normal speed.
Volume

Control the volume of the active Dub loop. The letter A or B on the slider indicates which loop is active. Dub Loop will remember the volume of loop A and B and display the active loop’s volume on the slider.
Effects
Reverb
MikeLoop’s reverb is very straightforward:
Reverb controls:
On/Off button

Switches the reverb on and off
XY pad

- drag the blue ball in the pad up and down to change the volume of the reverb
- drag the blue ball in the pad left and right to change the size of the room
Reverb EQ fader

Controls the brightness of the reverb. Drag the fader upwards for a brighter and downwards for a darker reverb color.
Bass
MikeLoop comes with a built in octaver. It makes your voice sound more like an electric bass, with no latency and no artificial sounding formant shift.
Bass controls:
On/Off button
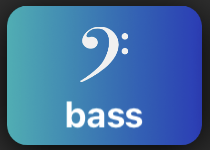
Switches the bass on and off.
Bass Volume fader

Controls the volume of the bass sound in relation to the original voice signal.
Side Menu
![]()
Klick on the 3 lines on the top left of the screen to access the Side menu:
- switch to MikeLoopPro subscription
- take a look at the manual
- store and load your loops in Storage
- choose a different Layout for MikeLoop
- activate your Audio Interface
Subscription

click on the MPro icon to switch between MikeLoop and MikeLoopPro.
MikeLoopPro adds many loop and effects functions to MikeLoop.
Learning Center
![]()
Manual
![]()
click on the Manual icon to open the manual. Exit the manual by clicking X on the top left of the screen.
Storage
![]()
You can either store and load individual loops or take a snapshot of all loops you recorded:
Loops
![]()
Click on the Loops icon. You will see your usual MikeLoop surface with all recorded loops and tracks grayed out. The bar on top will turn white.
Here's how you can store a loop:
- click on a recorded loop
- give your loop a name in the pop up window
- click store
Here's how you can load a loop back into MikeLoop:
- click on an empty loop
- choose a recording from the pop up list
Your recording will be loaded to the loop you have chosen.
Snapshots
![]()
Click on the Snapshots icon. You will see a new window with a list of your stored snapshots and 5 icons on the bottom:
- New
![]()
click on the New icon to store your snapshot. Name your snapshot in the pop up window
- Overwrite
![]()
- click on a snapshot in your list
- click Overwrite to replace that snapshot with your current work
- Load
![]()
- click on a snapshot in your list
- click Load to load that snapshot into MikeLoop
- Rename
![]()
- click on a snapshot in your list
- click Rename to change the name of that snapshot in the pop up window
- Delete
![]()
- click on a snapshot in your list
- click Delete to delete that snapshot
Layout
![]()
You can choose several different layouts to work with MikeLoop. Your layout could be all the way from very minimal to very complex, depending on your needs:
- MikeLoop Default
You find all MikeLoop functions in the default layout, with 4 Matrix Loops (with 4 tracks) and 10 Simple Loops. This is my preferred layout for most situations. - MikeLoop Simple Loop
This layout has 24 Simple Loops. This is convenient if you need a lot of loops to be played without them interacting very much. - MikeLoop Matrix Loop (1x3, Minimal)
This minimal layout features just one Matrix Loop with 4 tracks. It is meant to help you get accustomed to playing with MikeLoop, without getting too distracted by too many buttons and sliders. - MikeLoop Matrix Loop (5x5)
The Matrix Loop 5x5 layout is perfect for complex grooves and songs with different parts, like ABAC-forms etc. - MikeLoop Matrix Loop (2x12)
If you like to use lots of tracks instead of ever using the overdub function, you might enjoy working with this layout.
MikeLoop layouts are a work in progress. If you would like to work with a specific layout, feel free to send it to us and we will add it to the list.
Audio Interface

Once you connect an audio interface to your Ipad the interface will be listed here. MikeLoop will automatically switch to an external audio interface. You can also click on your device to activate it. The LEDs for Input and Output on the top right of the screen show you whether your interface is sending an audio signal to MikeLoop and back.